
Azure AKS에서 PV(영구볼륨)을 Azure File을 이용하여 만들기
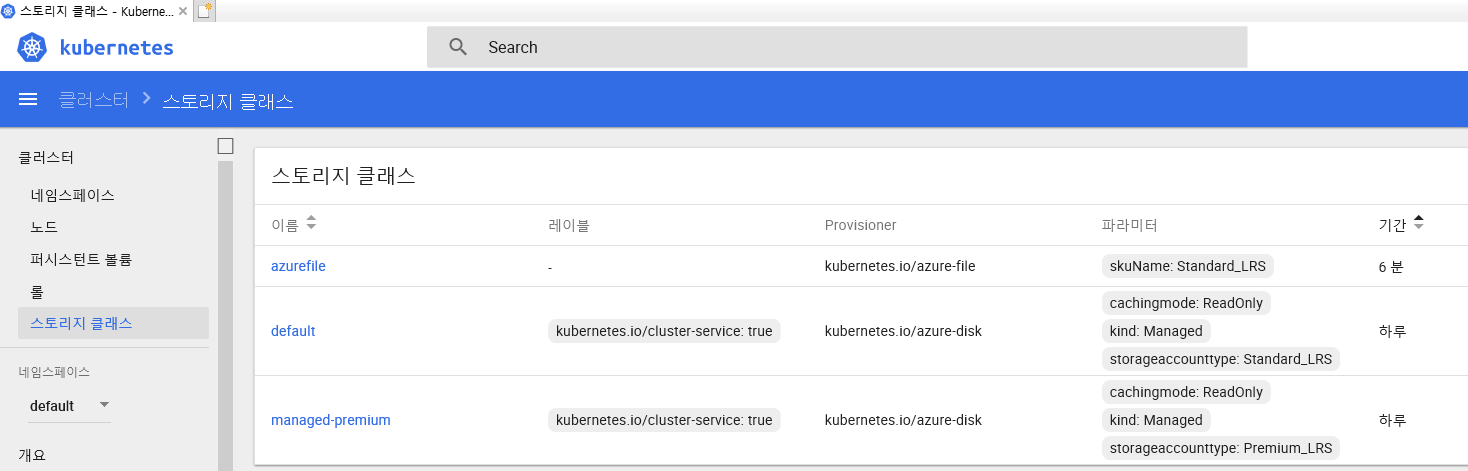
스토리지 클래스 만들기
azure-file-sc.yaml 를 만든다. 여기서는 azurefile을 이용한다.
kind: StorageClass
apiVersion: storage.k8s.io/v1
metadata:
  name: azurefile
provisioner: kubernetes.io/azure-file
mountOptions:
  - dir_mode=0777
  - file_mode=0777
  - uid=1000
  - gid=1000
  - mfsymlinks
  - nobrl
  - cache=none
parameters:
  skuName: Standard_LRS
kubectl apply 명령을 사용하여 스토리지 클래스를 만든다.
kubectl apply -f azure-file-sc.yaml
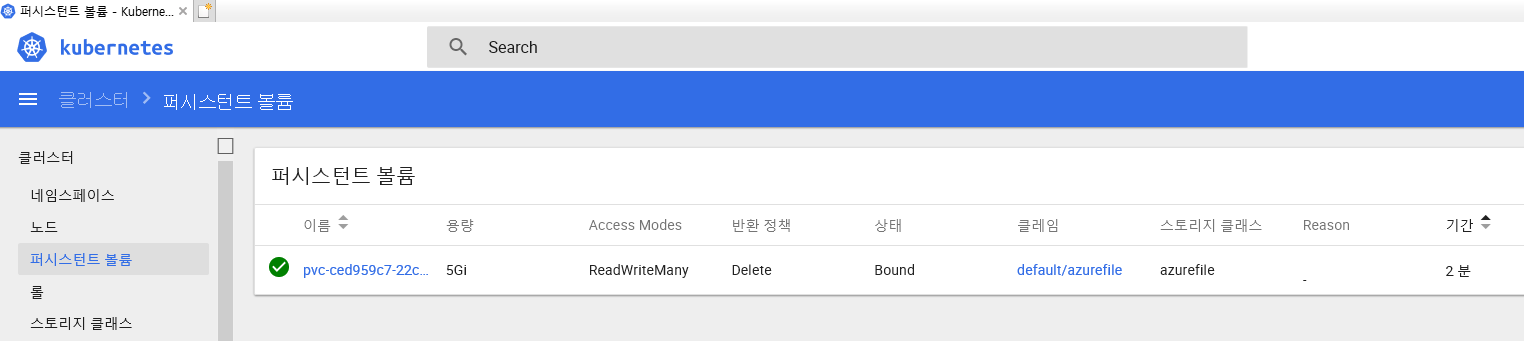
퍼시스턴트 볼륨 만들기
azure-file-pvc.yaml 를 만든다.
apiVersion: v1
kind: PersistentVolumeClaim
metadata:
  name: azurefile
spec:
  accessModes:
    - ReadWriteMany
  storageClassName: azurefile
  resources:
    requests:
      storage: 5Gi
kubectl apply 명령을 사용하여 퍼시스턴트볼륨클레임를 만든다.
kubectl apply -f azure-file-pvc.yaml
테스트해보기
기존 포스트에서 진행했던 DockerFile을 먼저 수정한다.
기존 포스트의 v2.0 Dockerfile과의 차이점은 볼륨을 바인딩하기 위한 폴더를 하나 생성해 줬다는 것이다. 아래 부분이 추가 되었다.
RUN powershell -Command New-Item -Path "C:\inetpub\wwwroot\volumetest" -ItemType Directory
예) C:\sample\v3.0\Dockerfile 전체소스
# Sample Dockerfile

# Indicates that the windowsservercore image will be used as the base image.
FROM mcr.microsoft.com/windows/servercore:ltsc2019
SHELL ["powershell", "-Command", "$ErrorActionPreference = 'Stop'; $ProgressPreference = 'SilentlyContinue';"]

# Metadata indicating an image maintainer.
#LABEL maintainer="syndy123@naver.com"

# Uses dism.exe to install the IIS role.
RUN dism.exe /online /enable-feature /all /featurename:iis-webserver /NoRestart

# Creates an HTML file and adds content to this file.
RUN echo "Hello World - Dockerfile" > c:\inetpub\wwwroot\index.html
RUN powershell -Command New-Item -Path "C:\inetpub\wwwroot\volumetest" -ItemType Directory

#EXPOSE 80

COPY ServiceMonitor.exe "C:\\"
#RUN powershell -Command Invoke-WebRequest -Uri https://dotnetbinaries.blob.core.windows.net/servicemonitor/2.0.1.6/ServiceMonitor.exe -OutFile C:\ServiceMonitor.exe
ENTRYPOINT ["C:\\ServiceMonitor.exe", "w3svc"]
다음 명령을 실행하여 ACR에 빌드하여 업로드한다.
az acr build --registry xxxcontainerregistry --platform Windows/amd64 --image hello-world:v3.0 C:\sample\v3.0
이제 쿠버네티스에 배포하기위해 hello-world.yaml 파일도 수정한다.
기존과의 차이점은 image의 버전이 v3.0으로 올라 갔다는 것이고 https: 를 지원하기 위해 443포트 부분도 추가되었다는 것이다.
그리고 가장 중요한 변경사항은 “c:\inetpub\wwwroot\volumetest” 폴더에 persistentVolume인 azurefile이 마운트 되었다는 것이다.
예) C:\sample\v3.0\hello-world.yaml 전체소스
apiVersion: apps/v1
kind: Deployment
metadata:
  name: hello-world
  labels:
    app: hello-world
spec:
  replicas: 1
  template:
    metadata:
      name: hello-world
      labels:
        app: hello-world
    spec:
      nodeSelector:
        "beta.kubernetes.io/os": windows
      containers:
      - name: hello-world
        image: xxxcontainerregistry.azurecr.io/hello-world:v3.0
        resources:
          limits:
            cpu: 1
            memory: 800M
          requests:
            cpu: .1
            memory: 300M
        ports:
          - containerPort: 80
          - containerPort: 443
        volumeMounts:
          - mountPath: "c:\\inetpub\\wwwroot\\volumetest"
            name: volume
      volumes:
      - name: volume
        persistentVolumeClaim:
            claimName: azurefile
  selector:
    matchLabels:
      app: hello-world
---
apiVersion: v1
kind: Service
metadata:
  name: hello-world
spec:
  type: LoadBalancer
  ports:
  - name: http
    protocol: TCP
    port: 80
    targetPort: 80
  - name: https
    protocol: TCP
    port: 443
    targetPort: 443
  selector:
    app: hello-world
다음 명령을 실행하여 쿠버네티스에 배포한다.
kubectl apply -f C:\sample\v3.0\hello-world.yaml
다음 명령을 통해 현재 실행되고 있는 파드를 검색해본다.
kubectl get pods
다음과 같이 hello-world-6cbccd4845-tp92t pod가 Running중임을 알 수 있다.
NAME                           READY   STATUS             RESTARTS   AGE
hello-world-6cbccd4845-tp92t   1/1     Running            0          62m
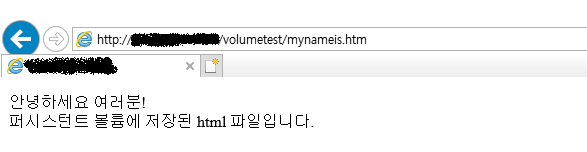
테스트를 위해 mynameis.htm 파일을 하나 생성한다.
C:\sample\v3.0\mynameis.htm 에 생성하면 되고 소스는 다음과 같다.
<!DOCTYPE html>
<html>
    <head>
        <meta charset="UTF-8" />
    </head>
    <body>
        <p>안녕하세요 여러분! <br>퍼시스턴트 볼륨에 저장된 html 파일입니다.</p>
    </body>
</html>
그리고 이 파일을 hello-world-6cbccd4845-tp92t pod의 volumetest 하위로 복사해보자
명령은 다음과 같다.
kubectl cp C:\sample\v3.0\mynameis.htm hello-world-6cbccd4845-tp92t:/inetpub/wwwroot/volumetest/mynameis.htm
이제 hello-world-6cbccd4845-tp92t pod 내부로 진입하여 실제로 파일이 복사가 잘 되었는지 확인해 본다.
kubectl exec -it hello-world-6cbccd4845-tp92t powershell
Windows PowerShell
Copyright (C) Microsoft Corporation. All rights reserved.
PS C:\> cd .\inetpub\
PS C:\inetpub> cd .\wwwroot\
PS C:\inetpub\wwwroot> cd .\volumetest\
PS C:\inetpub\wwwroot\volumetest> dir

    Directory: C:\inetpub\wwwroot\volumetest


Mode                LastWriteTime         Length Name
----                -------------         ------ ----
-a----       12/20/2019   5:32 AM            122 mynameis.htm
mynameis.htm 파일 복사가 잘 이루어 졌다.
웹호스팅도 잘된다.
hello-world-6cbccd4845-tp92t pod 의 “c:\inetpub\wwwroot\volumetest” 폴더가 persistentVolume인 azurefile이 마운트 되어 있기 때문에 이 pod 가 죽더라도 mynameis.htm 파일은 지워지지 않고 남아 있어야한다.
대쉬보드에서 이 pod를 의도적으로 삭제해본다. 그러면 다른 pod 가 자동 생성될 것이고 그 pod내부에 mynameis.htm 파일이 정상적으로 남아 있으면 된다.

삭제를 클릭하면 새로운 hello-world-6cbccd4845-4ntg pod가 만들어 진다.


hello-world-6cbccd4845-4ntgb pod 내부로 진입하여 확인해 보면 mynameis.htm 파일이 지워지지 않고 남아 있음을 확인할 수 있다.
kubectl exec -it hello-world-6cbccd4845-4ntgb powershell
PS C:\> cd .\inetpub\
PS C:\inetpub> cd .\wwwroot\
PS C:\inetpub\wwwroot> cd .\volumetest\
PS C:\inetpub\wwwroot\volumetest> dir


    Directory: C:\inetpub\wwwroot\volumetest


Mode                LastWriteTime         Length Name
----                -------------         ------ ----
-a----       12/20/2019   6:03 AM            221 mynameis.htm
별다른 문제 없어 잘 호스팅 되고 있음을 확인할 수 있다.

참고URL
https://docs.microsoft.com/ko-kr/azure/aks/azure-files-dynamic-pv
https://arisu1000.tistory.com/27849
댓글남기기